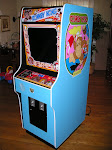
Monday, August 17, 2009

The Monitor Mount: Part 2

Bear with me on the next few posts - in all the excitement and since my dad was helping me out I didn't take as many pictures as I would have liked but I will do my best to explain exactly what I did.

The first thing I had to do was cut a piece of MDF exactly the width of the inside of the cabinet with a hole in the middle for the monitor to poke through. Getting the dimensions of the hole was difficult because all of the sides are curved and I had to make sure not to remove too much material. I came up with a method that ended up working but took way longer than it should have. If I ever have to do this again I think I could make it pretty quick.

Anyway, I cut some poster board into some long strips and taped them together end to end. Then I wrapped the poster board around the outside of the monitor. This was done in order to trace the shape onto a piece of cardboard. I figured if I could make a hole in some cardboard that would fit exactly around the monitor I'd be able to use it as a pattern to place it in the MDF.

I ended up using a pizza box held up against the front of the monitor/blue poster board and traced the shape. Then I cut out the hole and tried fitting the frame around the monitor. It wasn't perfect on the first try but what this allowed me to do was refine the cutout. After fitting the pizza box around the monitor there were tons of gaps and nothing fit quite right so while the pizza box was in place I covered the gaps with strips of blue painter's tape. Once I was satisfied with the coverage I removed the pizza box (with the tape still in place) and had a template for the shape of the monitor which I traced onto pizza box #2.

Next I cut out the shape I just traced onto pizza box #2 and fit it around the monitor - much better! I ended up having to make a few tweaks with some more blue painter's tape because I was cutting the cardboard freehand but I eventually got a really nice pattern. Then I centered it onto the MDF panel that will hold the monitor and I cut it out (free hand with my router after rough cutting with my jigsaw). It worked!

The next thing I had to do was remove the triangular brackets from the sides of the monitor (remember, the whole point of this exercise is to remove those things because they stick out of the back of the cabinet). Once that was done, the monitor cannot be put down! I quickly positioned the MDF panel I had just cut out around the monitor and located the holes for the bolts in each corner. I drilled out the holes and bolted the monitor in place - success!

These aren't the best pictures of the panel but you get the idea - the pizza box pattern was for placing the monitor in the MDF and then I had to drill a hole in each corner for the bolts - I had to be precise with everything because the bolt holes are so close to the monitor cutout but you can see on the bottom that my freehand skills with the router aren't the best.

Whew! This was the easy part...

More later.

Thursday, August 13, 2009

The Monitor Mount

Next up, installing the monitor. This was so difficult and I definitely could not have done it without the help of my dad (and mom!). From the start of this project I knew the monitor mount would be tricky because I was going to deviate a bit from the original design. I did not want to put bolts through the side of the cabinet in order to support the monitor like this (thanks for the pic Neilyboy):

I don't know why... maybe I just didn't like the thought of poking holes in the side art. The problem with wanting to do this is that the sides are only 9/16" thick which isn't nearly enough material to screw into to support a ~50 lb. monitor so I had to think of a way to get the monitor at the proper angle and supported from the bottom.

Another problem was that the monitor had triangular brackets on each side which supported the monitor in a horizontal position. When placing the monitor vertically in the Donkey Kong cabinet these brackets stuck out the back - this is obviously unacceptable so they had to be removed. Compounding the issue was that these brackets also held the electronics of the monitor in place! See:

The final problem was making a frame for the monitor. After removing the triangular brackets there was no way to actually mount the monitor! Did I figure it out?

Stay tuned...

Wednesday, August 5, 2009

Camera Dump

I finally mounted the monitor - what an unbelievable headache. It took 2 full days and I probably went overboard so I don't have the energy to write something up at the moment. In the meantime here are some random shots of the cabinet that were on my camera showing kind of where I'm at right now. If I don't post them here I might as well delete them. The marquee lights up really really nice...

The monitor mount is coming...

More later.

Friday, July 31, 2009

The Marquee

Now this was fun. After I got the bottom marquee retainer and coin door back painted I was able to install the marquee and marquee light. It looks great!

It was fairly easy - first, I secured the 18" light I bought from Home Depot ($10) in place.

Next, I screwed the bottom marquee retainer in place with the marquee in position. Finally, I screwed the top marquee retainer in place. The light will be in the "always on" position and plugged into a SmartStrip which will be activated when the computer powers up. I'm getting closer!

I need to find some less obvious screws for the top marquee retainer. The ones I used are silver and quite noticeable. I'd like to replace them with some round head ones spraypainted black. I'll get to that eventually.

EDIT: I replaced the screws the other night. I ordered some from QuarterArcade and they look GREAT. No spraypainting necessary!

More later.

Monday, July 27, 2009

The T-Molding

Now that I am finished with painting the fun stuff can begin. The first thing I wanted to do was install the t-molding to the edges of the cabinet.

This stuff is kind of a pain but it is easy enough to install I guess. I used a rubber mallet to tap the t-molding into the slot. The only tricky part was going around the bends but all I had to do was use a razor to remove small sections of the spine of the t-molding so it had room to bend.

In order to finish the installation I tipped the cabinet on its back so I could wrap it underneath. It is a weird design but the original cabinets only wrap the t-molding about 1/3 of the way underneath the base. If it were me I would have gone all the way to the back.

It is amazing the difference that it makes. The clean lines around the outside of the cabinet really give it a factory-fresh appearance.

The entire installation took about an hour.

More later.

Thursday, July 23, 2009

Reattaching The Base

What a pain! After I rebuilt the entire base again due to my stupidity it was time to attach it to the cabinet. The first thing I had to do was remove the existing base. This proved to be very difficult because the original was attached from the inside using small staples that I couldn't see. I ended up using a crowbar to pry all 4 pieces off and it took quite a bit of strength.

Here is the bottom without the base:

The next part wasn't so hard. I bought some L-brackets and used them to secure the new base in place. I pre-drilled all of the holes for the screws and it went on pretty quick. I was going to use more but after putting the first 4 in place it was rock solid so I left it.

It looks pretty nice installed. It isn't something everyone will notice but I think it looks a million times better than what was there previously. Plus, I was able to add the rubber feet which will make it easier on the floor of my house.

More later.

Wednesday, July 22, 2009

The Admin Buttons

Since I have decided to put a computer inside of this cabinet which will run MAME I need some admin buttons in order to work the front-end and MAME itself. The goal of this project is to keep the cabinet as authentic as possible and only make deviations from the original design when I feel it is an improvement or out of necessity. Admin buttons ruin the illusion that this is an actual Donkey Kong cabinet straight out of 1981 so I have to hide them. Fortunately there is a lip underneath the control panel area with plenty of room:

The cabinet is tipped on its side here and you can see the area I'm talking about. Man it drives me nuts the way this thing was originally put together - look at the gap between the speaker panel on the front and the panel underneath! Thankfully no one will ever see this mess.

I decided on three admin buttons - Exit (which will allow the player to exit the current game back to the list of games on the front end), Pause (because I have kids and rarely get 10 consecutive minutes to do anything) and Coin (the coin door will be fully functional but this will make it a bit easier). The Pause and Coin buttons are also going to double as Volume Up and Volume Down when shifted by pressing the Player 2 Start Button in the control panel.

Since I don't want these buttons to ever be seen I decided to countersink them into the wood panel so the top of the button is flush with the panel. It was easy enough to do. I used a 1-3/8" forstner bit to countersink the buttons and when I got about 1/4" down I switched to a 1-1/8" forstner bit to finish the job.

It was tough to get the drill in there just right - the plywood was not even close to level so the lip in the front is actually a little deeper than in the back for each button. Here is how the buttons will sit in the holes I drilled:

The last thing I did was take some powder blue paint and paint the exposed wood to match the cabinet exterior. Even though no one will ever see this I wanted to make it look somewhat neat even though it is a mess. If I was building this from scratch I would have pre-drilled all of these holes prior to assembly and I would have rounded over the edges of the recessed holes. Oh well. It came out OK but most importantly it is going to work great.

I should also note that I drilled a hole to the far left for the Exit button and I drilled two holes to the far right for the Pause and Coin buttons. I don't want anyone to accidentally hit Exit in the middle of a game when they were only reaching for the Pause button!

Things are coming together now. Tonight I'll reattach the new base I made and install the t-molding and some other stuff.

More later.