
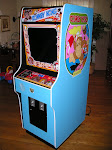
Since I have decided to put a computer inside of this cabinet which will run MAME I need some admin buttons in order to work the front-end and MAME itself. The goal of this project is to keep the cabinet as authentic as possible and only make deviations from the original design when I feel it is an improvement or out of necessity. Admin buttons ruin the illusion that this is an actual Donkey Kong cabinet straight out of 1981 so I have to hide them. Fortunately there is a lip underneath the control panel area with plenty of room:
 The cabinet is tipped on its side here and you can see the area I'm talking about. Man it drives me nuts the way this thing was originally put together - look at the gap between the speaker panel on the front and the panel underneath! Thankfully no one will ever see this mess.
I decided on three admin buttons - Exit (which will allow the player to exit the current game back to the list of games on the front end), Pause (because I have kids and rarely get 10 consecutive minutes to do anything) and Coin (the coin door will be fully functional but this will make it a bit easier). The Pause and Coin buttons are also going to double as Volume Up and Volume Down when shifted by pressing the Player 2 Start Button in the control panel.
Since I don't want these buttons to ever be seen I decided to countersink them into the wood panel so the top of the button is flush with the panel. It was easy enough to do. I used a 1-3/8" forstner bit to countersink the buttons and when I got about 1/4" down I switched to a 1-1/8" forstner bit to finish the job.
 It was tough to get the drill in there just right - the plywood was not even close to level so the lip in the front is actually a little deeper than in the back for each button. Here is how the buttons will sit in the holes I drilled:
 The last thing I did was take some powder blue paint and paint the exposed wood to match the cabinet exterior. Even though no one will ever see this I wanted to make it look somewhat neat even though it is a mess. If I was building this from scratch I would have pre-drilled all of these holes prior to assembly and I would have rounded over the edges of the recessed holes. Oh well. It came out OK but most importantly it is going to work great.
 I should also note that I drilled a hole to the far left for the Exit button and I drilled two holes to the far right for the Pause and Coin buttons. I don't want anyone to accidentally hit Exit in the middle of a game when they were only reaching for the Pause button!
Things are coming together now. Tonight I'll reattach the new base I made and install the t-molding and some other stuff.
More later.
No comments:
Post a Comment