Friday, July 31, 2009

The Marquee

Now this was fun. After I got the bottom marquee retainer and coin door back painted I was able to install the marquee and marquee light. It looks great!

It was fairly easy - first, I secured the 18" light I bought from Home Depot ($10) in place.

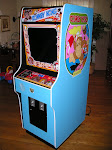
Next, I screwed the bottom marquee retainer in place with the marquee in position. Finally, I screwed the top marquee retainer in place. The light will be in the "always on" position and plugged into a SmartStrip which will be activated when the computer powers up. I'm getting closer!

I need to find some less obvious screws for the top marquee retainer. The ones I used are silver and quite noticeable. I'd like to replace them with some round head ones spraypainted black. I'll get to that eventually.

EDIT: I replaced the screws the other night. I ordered some from QuarterArcade and they look GREAT. No spraypainting necessary!

More later.

Monday, July 27, 2009

The T-Molding

Now that I am finished with painting the fun stuff can begin. The first thing I wanted to do was install the t-molding to the edges of the cabinet.

This stuff is kind of a pain but it is easy enough to install I guess. I used a rubber mallet to tap the t-molding into the slot. The only tricky part was going around the bends but all I had to do was use a razor to remove small sections of the spine of the t-molding so it had room to bend.

In order to finish the installation I tipped the cabinet on its back so I could wrap it underneath. It is a weird design but the original cabinets only wrap the t-molding about 1/3 of the way underneath the base. If it were me I would have gone all the way to the back.

It is amazing the difference that it makes. The clean lines around the outside of the cabinet really give it a factory-fresh appearance.

The entire installation took about an hour.

More later.

Thursday, July 23, 2009

Reattaching The Base

What a pain! After I rebuilt the entire base again due to my stupidity it was time to attach it to the cabinet. The first thing I had to do was remove the existing base. This proved to be very difficult because the original was attached from the inside using small staples that I couldn't see. I ended up using a crowbar to pry all 4 pieces off and it took quite a bit of strength.

Here is the bottom without the base:

The next part wasn't so hard. I bought some L-brackets and used them to secure the new base in place. I pre-drilled all of the holes for the screws and it went on pretty quick. I was going to use more but after putting the first 4 in place it was rock solid so I left it.

It looks pretty nice installed. It isn't something everyone will notice but I think it looks a million times better than what was there previously. Plus, I was able to add the rubber feet which will make it easier on the floor of my house.

More later.

Wednesday, July 22, 2009

The Admin Buttons

Since I have decided to put a computer inside of this cabinet which will run MAME I need some admin buttons in order to work the front-end and MAME itself. The goal of this project is to keep the cabinet as authentic as possible and only make deviations from the original design when I feel it is an improvement or out of necessity. Admin buttons ruin the illusion that this is an actual Donkey Kong cabinet straight out of 1981 so I have to hide them. Fortunately there is a lip underneath the control panel area with plenty of room:

The cabinet is tipped on its side here and you can see the area I'm talking about. Man it drives me nuts the way this thing was originally put together - look at the gap between the speaker panel on the front and the panel underneath! Thankfully no one will ever see this mess.

I decided on three admin buttons - Exit (which will allow the player to exit the current game back to the list of games on the front end), Pause (because I have kids and rarely get 10 consecutive minutes to do anything) and Coin (the coin door will be fully functional but this will make it a bit easier). The Pause and Coin buttons are also going to double as Volume Up and Volume Down when shifted by pressing the Player 2 Start Button in the control panel.

Since I don't want these buttons to ever be seen I decided to countersink them into the wood panel so the top of the button is flush with the panel. It was easy enough to do. I used a 1-3/8" forstner bit to countersink the buttons and when I got about 1/4" down I switched to a 1-1/8" forstner bit to finish the job.

It was tough to get the drill in there just right - the plywood was not even close to level so the lip in the front is actually a little deeper than in the back for each button. Here is how the buttons will sit in the holes I drilled:

The last thing I did was take some powder blue paint and paint the exposed wood to match the cabinet exterior. Even though no one will ever see this I wanted to make it look somewhat neat even though it is a mess. If I was building this from scratch I would have pre-drilled all of these holes prior to assembly and I would have rounded over the edges of the recessed holes. Oh well. It came out OK but most importantly it is going to work great.

I should also note that I drilled a hole to the far left for the Exit button and I drilled two holes to the far right for the Pause and Coin buttons. I don't want anyone to accidentally hit Exit in the middle of a game when they were only reaching for the Pause button!

Things are coming together now. Tonight I'll reattach the new base I made and install the t-molding and some other stuff.

More later.

Tuesday, July 21, 2009

Measure Once, Cut Twice?

I'm an idiot. I tipped the cabinet on its side to put the last coats of paint on (latex dries better horizontally, I think) and I noticed that when I measured the base I didn't account for the overlap from the side panels so it is actually an inch taller than I thought.

I had to remake the entire thing using a 1 x 4 (3/4" x 3-1/2"). It was easy enough and only took about an hour but I did have to spend an extra $16 on the maple and I still have to paint it black.

The good news is that I finally figured out how to paint the sides without leaving roller marks - I bought a 1/4" nap roller and that did the trick. The foam roller was spreading the paint too thin and it was drying before I had a chance to even it out. It looks real good now.

More later.

Saturday, July 18, 2009

Another Coat of Powder Blue? Ugh.

Well, I spent some time sanding down the cabinet and getting it ready for what I had hoped would be the last coat of blue paint. Unfortunately, after letting it dry for a few days I have decided to give it one more coat.

There was still a hint of the white primer underneath (since sanding in some parts took it back down to the primer) and there is one part on the right panel that you can clearly see some overlap from the roller. It is all I will ever see on this thing if I don't take care of it.

Anyway, here is what it looks like at the moment after 3 coats of the powder blue paint:

This sets me back slightly in that I wanted to install the t-molding today but no big deal. Tomorrow morning I am going to put the *final* coat of paint on the cabinet and then later in the afternoon I'm going to install the t-molding and maybe install the base if the paint is dry enough.

More later.

Friday, July 17, 2009

Some Progress Pics

OK - here are some decent shots of what the cabinet looks like after applying two coats of the powder blue paint.

I applied one last coat on top of this and hopefully that is it (I'll post some more pictures of that even though it looks kind of the same as these). Once I am finished painting the rest of the project should fly.

It's funny how the color looks different depending on the lighting but it all looks real even in person. Hopefully the sideart will go on nice and smooth - I'm nervous just thinking about it.

More later.

Thursday, July 16, 2009

The Powder Blue Paint. Ugh.

Well here we go. In case you couldn't tell yet, I hate painting. It is finally time to apply the powder blue paint on the sides and front of the cabinet. The goal here is to apply several thin coats in order to achieve as flat of a finish as possible. The smoother the finish, the nicer it looks and the better chance I have of actually putting this thing somewhere in my house.

I went to Sherwin-Williams to get some high quality paint and I think I got some good stuff. You can get the formula off of the picture below:

I was going to get an oil-based product but due to environmental laws in my area they could only sell me a quart and on top of that they didn't have the right base for the color codes I had so I ended up going with latex. The guy assured me that it was their flagship product and it would dry nice and even (which it did). I'm quite happy with how it is turning out after applying two coats.

More later.

Wednesday, July 15, 2009

Replacing The Base 3

Last night I put the black paint on the base I made so that part is now finished. The Rustoleum black paint is awesome stuff. It dries evenly and after 3 quick coats it looks great.

I'm also happy I took the time to mitre the corners - they look great too. After the blue paint dries on the cabinet I'll tip it back and install this thing with some L-brackets and glue.

More later.

Tuesday, July 14, 2009

Replacing The Base 2

Not much more progress on the base last night. I was sidetracked by painting the cabinet blue (more on that later).

Here is what the base looks like unclamped:

And here is what the rubber feet look like:

They were the smallest I could find at Home Depot that weren't adhesive-backed (which always come off eventually). I didn't want the base to be too high off of the ground but I did want something on the bottom to protect the base from being beat up over time.

Tonight I'll definitely get the paint on this thing. I put two blue coats on the entire cabinet (one last night and one this morning) and I've decided to wait until tomorrow night (36 hours) before sanding and putting on the third and final coat. I want to make sure it is dry.

More later.

Monday, July 13, 2009

Replacing The Base

I decided to wait an extra day to let the black paint fully cure before I remove the blue tape and start prepping for the powder blue paint on the sides and front. In the meantime I started to rebuild the base of the cabinet. After years and years of sitting on the ground and being moved around it started to splinter and generally looks horrible.

It was easy to duplicate. I started out with an 8' long 3" x 1" piece of maple from Home Depot. I chose maple because it was harder than pine (the only other choice in the store). I should note that the actual measurements of a 1" x 3" is 3/4" x 2-1/2" which is perfect for the height of the base.

NOTE: SEE HERE FOR ACTUAL MEASUREMENTS OF THE BASE - I WAS OFF BY 1" ON THE HEIGHT.

The dimensions of the base are 22" x 24-7/8" x 2-1/2". I cut up the maple accordingly with my chop saw and put a 45 degree cut on the ends so the corners would join together nicely. I also used my trusty biscuit cutter to cut some slots on the ends for some #10 biscuits. This will create a VERY strong joint when it is glued up. There is more surface area for the glue and the biscuit expands in the slot.

Before gluing everything together I applied 3 coats of the BIN Zinsser primer to hide the wood grain. I will paint it black once the pieces are glued together. I love this stuff.

I laid out everything on my dining room table (with some wax paper underneath in case of glue spillage).

I used two band clamps and 4 regular clamps to hold everything together. The joints are nice and tight and I checked it for squareness and it is pretty good.

It is drying right now. Tonight I'll apply the black paint (probably two coats) and install some small rubber feet for the base to sit on. Once the paint job on the rest of the cabinet is finished I'll take off the old base and install this one.

More later.

Friday, July 10, 2009

Painting Has Continued. Ugh.

Last night I was able to put the first coat of black paint on the inside edges of the cabinet. I had to be careful taping everything because a straight and clean line is important to the overall look of the finished cabinet. I let the first coat dry overnight and then woke up really early to put on a second coat prior to going to work. I'm using Rustoleum brand Black (Semi-Gloss) latex paint.

It came out OK I guess - I am really particular (i.e. anal) when it comes to this type of stuff and my stupid brain can't accept that rolling on paint will never look as nice as laminate. I think I am going to do some light sanding when I get home and then apply a final coat of black paint. There's not much more I can do to make it look nicer.

I will finally be painting the rest of the cabinet powder blue over the weekend. When that is finished I'll be able to do some fun stuff like install the artwork and control panel. I need to start thinking about getting an arcade monitor and junker computer to throw inside to run everything.

More later.

Thursday, July 9, 2009

Painting Has Begun. Ugh.

I finally got a chance to put a few coats of primer on the cabinet. There's nothing special about my technique - I am using Zinsser BIN Primer (pictured) and so far I've put on 4 coats using a foam roller and a paintbrush (for the inside corners). I sanded with 400 grit sandpaper in between coats and the entire surface is fairly smooth. It isn't perfect by any stretch and there is some "orange peel" effect over the entire surface. I still have to do some final sanding before putting the top coats on.

Here is where I'm at:

I should probably get a shot of it outside instead of in a dark garage but whatever. I didn't take many pictures of this process since it is hard enough to do without worrying about my camera. Plus, this part is boring.

More later.

Wednesday, July 1, 2009

Recreating The Control Panel - Cost

For those that are interested, here is the cost breakdown of the control panel:

  1. Control panel overlay: $30 from eBay
  2. Control panel instruction card underlay: $5 from Arcade Shop
  3. Button set for Nintendo Classic control panels: $15 from Mike's Arcade
  4. Nintendo Control Panel bolt set (8 bolts/nuts): $10 from Mike's Arcade
  5. 3 Nintendo button holders (with microswitches): $12 from VAPS member
  6. Nintendo CP Strike Set: $5 from Mike's Arcade
  7. Joystick (Sanwa JLF) and harness: $35 from lizardlick.com
  8. 1/16" ABS plastic (24" x 24"): $17 from eBay
  9. 1/2" MDF panel: $0 (on hand)
TOTAL: $129! Holy. Crap. That really added up fast and I didn't even include the cost of the t-molding since that is primarily for the cabinet itself. I'm very happy with it and it is as close to original as I could get it (other than the JLF which I think is an improvement over the original Nintendo joystick).